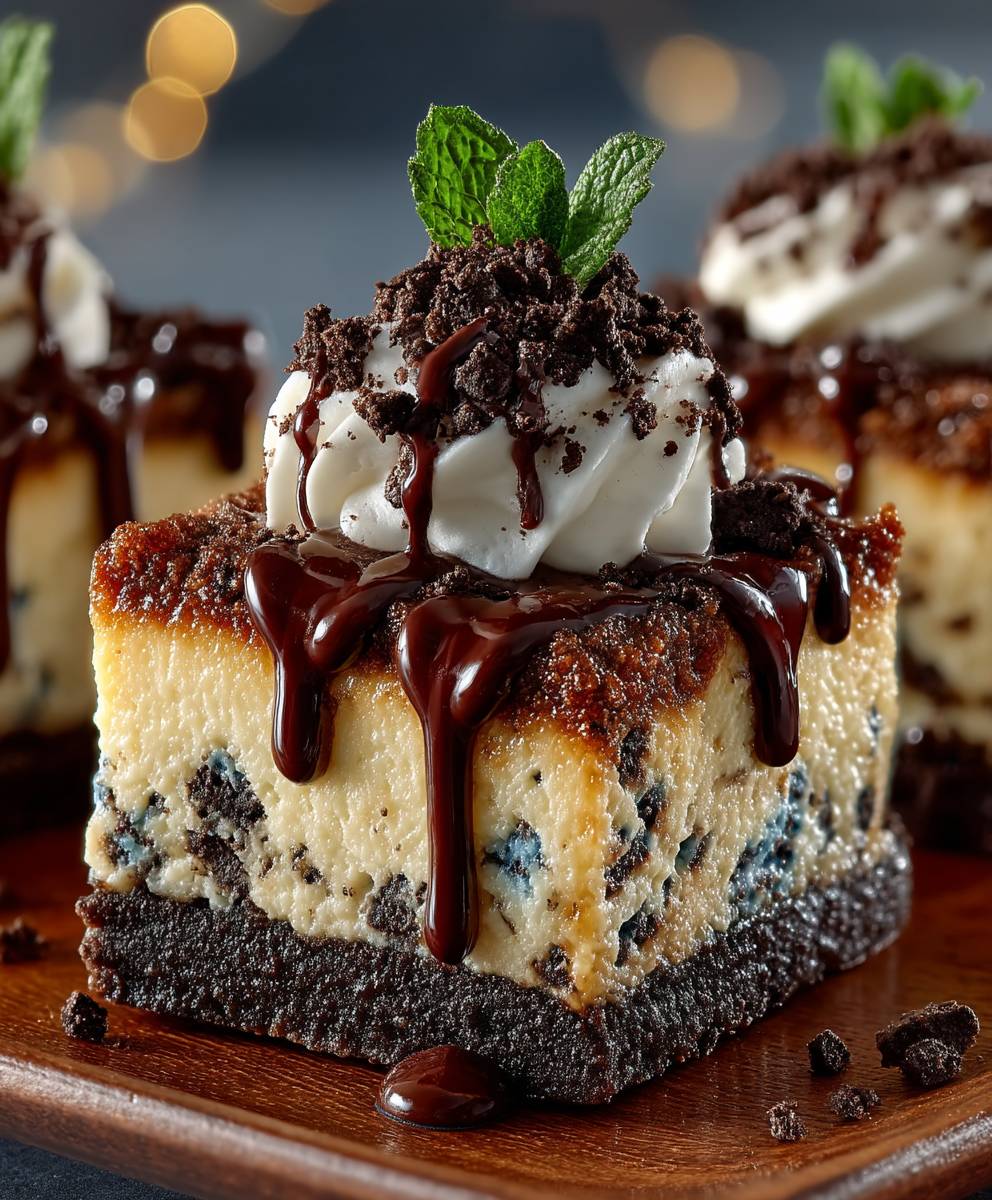
Slutty Cheesecake Bars: Prepare to be utterly seduced by the most decadent, irresistible dessert you’ll ever bake! Imagine this: a buttery, crumbly Oreo cookie base, a creamy, dreamy cheesecake filling, and a generous layer of chocolate chip cookie dough, all baked together into one glorious bar. It’s a symphony of textures and flavors that will have everyone begging for more.
While the name might raise an eyebrow, the origin of these slutty cheesecake bars is shrouded in a bit of mystery. Some say they were born from a desire to combine all the best dessert elements into one outrageous creation. Others believe the name is simply a playful nod to their unapologetically indulgent nature. Regardless of their history, these bars have become a viral sensation, and for good reason!
What makes these bars so beloved? It’s the perfect combination of textures – the crisp Oreo crust, the smooth cheesecake, and the chewy cookie dough. And the taste? Oh, the taste! The rich chocolate, the tangy cheesecake, and the sweet cookie dough create a flavor explosion that’s simply divine. Plus, they’re surprisingly easy to make, making them the perfect treat for any occasion, from casual gatherings to special celebrations. Get ready to experience dessert bliss!

Ingredients:
- For the Oreo Crust:
- 36 Oreo cookies, finely crushed (about 3 cups)
- 6 tablespoons (3 ounces) unsalted butter, melted
- For the Cheesecake Filling:
- 3 (8 ounce) packages cream cheese, softened to room temperature
- 1 1/4 cups granulated sugar
- 1 teaspoon vanilla extract
- 3 large eggs
- For the Brownie Layer:
- 1 cup (2 sticks) unsalted butter
- 1 cup granulated sugar
- 1 cup packed light brown sugar
- 1 cup unsweetened cocoa powder
- 1/2 teaspoon salt
- 2 teaspoons vanilla extract
- 4 large eggs
- 1 cup all-purpose flour
- 1 cup chocolate chips (semi-sweet or dark, your preference!)
Preparing the Oreo Crust:
- Crush the Oreos: The first step is to get those Oreos crushed! You can use a food processor for this, pulsing until you have fine crumbs. If you don’t have a food processor, no worries! Just place the Oreos in a large zip-top bag, seal it tightly, and use a rolling pin to crush them into fine crumbs. Make sure there aren’t any large chunks left.
- Combine with Butter: In a medium bowl, combine the crushed Oreo crumbs and the melted butter. Mix well until the crumbs are evenly moistened. The mixture should resemble wet sand.
- Press into Pan: Press the Oreo mixture firmly into the bottom of a 9×13 inch baking pan. I like to use the bottom of a measuring cup or a flat-bottomed glass to really pack it down and create an even crust. This is important so the crust doesn’t crumble when you cut the bars later.
- Pre-bake (Optional): For a crispier crust, you can pre-bake it in a preheated oven at 350°F (175°C) for about 8-10 minutes. This step is optional, but I find it helps prevent the crust from becoming soggy. Let it cool slightly before adding the brownie layer.
Making the Brownie Layer:
- Melt the Butter: In a large, microwave-safe bowl, melt the butter. You can do this in 30-second intervals, stirring in between, until completely melted. Be careful not to overheat it!
- Combine Sugars and Cocoa: Add the granulated sugar, brown sugar, cocoa powder, and salt to the melted butter. Whisk everything together until well combined and smooth. The mixture will be quite thick.
- Add Vanilla and Eggs: Stir in the vanilla extract. Then, add the eggs one at a time, mixing well after each addition. It’s important to incorporate each egg fully before adding the next to ensure a smooth brownie batter.
- Incorporate Flour: Gradually add the flour to the wet ingredients, mixing until just combined. Be careful not to overmix, as this can lead to tough brownies. A few streaks of flour are okay at this point.
- Add Chocolate Chips: Fold in the chocolate chips. I love using a mix of semi-sweet and dark chocolate chips for a richer flavor, but you can use whatever you prefer.
- Pour over Crust: Pour the brownie batter evenly over the prepared Oreo crust. Spread it out to the edges of the pan.
Preparing the Cheesecake Filling:
- Beat Cream Cheese: In a large bowl (or the bowl of a stand mixer), beat the softened cream cheese until smooth and creamy. This is crucial for a lump-free cheesecake filling. Make sure your cream cheese is truly at room temperature; otherwise, you’ll end up with clumps.
- Add Sugar: Gradually add the granulated sugar to the cream cheese, beating until well combined and smooth. Scrape down the sides of the bowl as needed to ensure everything is evenly mixed.
- Incorporate Vanilla: Stir in the vanilla extract.
- Add Eggs: Add the eggs one at a time, mixing on low speed until just combined. Again, be careful not to overmix. Overmixing can incorporate too much air into the batter, which can cause the cheesecake to crack during baking.
Assembling and Baking:
- Pour Cheesecake Filling: Carefully pour the cheesecake filling evenly over the brownie layer. Gently spread it out to cover the entire surface.
- Bake: Bake in a preheated oven at 350°F (175°C) for 45-55 minutes, or until the cheesecake filling is set around the edges but still slightly jiggly in the center. The baking time may vary depending on your oven, so keep an eye on it.
- Cooling Process: Turn off the oven and crack the oven door slightly. Let the cheesecake bars cool in the oven for about 1 hour. This helps prevent cracking by allowing the cheesecake to cool gradually.
- Refrigerate: After cooling in the oven, remove the pan and let it cool completely at room temperature. Then, cover the pan with plastic wrap and refrigerate for at least 4 hours, or preferably overnight. This allows the cheesecake to set completely and the flavors to meld together.
- Cutting and Serving: Once the cheesecake bars are thoroughly chilled, cut them into squares using a sharp knife. For clean cuts, you can run the knife under hot water and wipe it clean between each cut.
Tips for Success:
- Room Temperature Ingredients: Using room temperature cream cheese and eggs is essential for a smooth and creamy cheesecake filling. Take them out of the refrigerator at least an hour before you start baking.
- Don’t Overmix: Overmixing the brownie and cheesecake batters can lead to tough brownies and a cracked cheesecake. Mix until just combined.
- Cooling is Key: The cooling process is just as important as the baking process. Cooling the cheesecake bars gradually helps prevent cracking.
- Variations: Feel free to customize these bars to your liking! You can add different types of chocolate chips to the brownie layer, swirl in some caramel sauce into the cheesecake filling, or top the bars with chopped nuts or sprinkles.
- Storage: Store leftover cheesecake bars in an airtight container in the refrigerator for up to 5 days.
Troubleshooting:
- Cracked Cheesecake: If your cheesecake cracks, don’t worry! It’s still delicious. You can cover the cracks with whipped cream, chocolate shavings, or fresh berries. To prevent cracking in the future, try cooling the cheesecake more gradually and avoid overbaking.
- Soggy Crust: If your Oreo crust is soggy, try pre-baking it for a few minutes before adding the brownie layer. This will help crisp it up.
- Uneven Layers: To ensure even layers, use a kitchen scale to measure the ingredients accurately. Also, make sure to spread the brownie and cheesecake batters evenly over the crust.
Why This Recipe Works:
This recipe is a guaranteed crowd-pleaser because it combines three of the most beloved desserts: Oreos, brownies, and cheesecake! The Oreo crust provides a delicious, crunchy base, the brownie layer adds a rich, chocolatey flavor, and the cheesecake filling provides a creamy, tangy contrast. The combination of textures and flavors is simply irresistible.
Serving Suggestions:
These slutty cheesecake bars are perfect for parties, potlucks, or any occasion where you want to impress your friends and family. They’re also a great treat to make for yourself when you’re craving something decadent and delicious. Serve them chilled, and consider adding a dollop of whipped cream or a scoop of ice cream on top for an extra special treat.
Enjoy!
I hope you enjoy making and eating these slutty cheesecake bars as much as I do! They’re a truly indulgent treat that’s sure to satisfy your sweet tooth.
Conclusion:
And there you have it! These slutty cheesecake bars are truly a decadent dream come true, and I genuinely believe they’re a must-try for anyone who loves a little bit of everything in their dessert. The combination of the Oreo crust, the fudgy brownie layer, and that creamy, tangy cheesecake swirl is simply irresistible. It’s a symphony of textures and flavors that will have you reaching for seconds (and maybe even thirds!).
But why are these bars so special? It’s the ease of preparation combined with the sheer indulgence. You get the satisfaction of baking something truly impressive without spending hours in the kitchen. Plus, the recipe is incredibly forgiving, so even if you’re a novice baker, you’re almost guaranteed to end up with a batch of bars that will wow your friends and family.
Beyond the basic recipe, there’s so much room for customization! Feeling adventurous? Try swapping out the Oreos for another type of cookie, like chocolate chip or peanut butter. You could also add a layer of caramel or a sprinkle of sea salt on top for an extra touch of sophistication. For a festive twist, consider using red and green sprinkles during the holidays. And if you’re a fruit lover, a layer of fresh berries or a swirl of fruit preserves would be absolutely divine.
Serving Suggestions:
These slutty cheesecake bars are perfect on their own, but they’re even better when paired with a scoop of vanilla ice cream or a dollop of whipped cream. A drizzle of chocolate sauce or a sprinkle of cocoa powder would also be a welcome addition. For a more sophisticated presentation, try cutting the bars into smaller squares and arranging them on a platter with fresh fruit. They’re also fantastic served slightly chilled, which allows the flavors to meld together even more.
Variations to Explore:
* Peanut Butter Bliss: Use peanut butter Oreos for the crust and swirl peanut butter into the cheesecake batter.
* Chocolate Lover’s Dream: Add chocolate chips to both the brownie and cheesecake layers.
* Caramel Crunch: Drizzle caramel sauce over the top of the bars and sprinkle with chopped pecans.
* Mint Chocolate Chip: Use mint Oreos for the crust and add mint extract and chocolate chips to the cheesecake batter.
* S’mores Sensation: Top the bars with mini marshmallows and graham cracker crumbs before baking.
I’m so excited for you to try this recipe and experience the magic of these slutty cheesecake bars for yourself. I truly believe they’ll become a new favorite in your household. Don’t be afraid to get creative and experiment with different flavors and toppings to create your own unique version.
And most importantly, I’d love to hear about your experience! Once you’ve made these bars, please come back and leave a comment below. Let me know what you thought, what variations you tried, and any tips or tricks you discovered along the way. Sharing your experiences helps other bakers and inspires new ideas. Happy baking, and enjoy every single bite! I can’t wait to hear all about your slutty cheesecake bars success stories!
Slutty Cheesecake Bars: The Ultimate Recipe for Decadent Dessert
Decadent bars featuring an Oreo crust, rich brownie layer, and creamy cheesecake filling. Perfect for parties or a special treat!
Ingredients
* **Reformat it:** Present it in a different layout (e.g., a more concise format, a bulleted list, etc.).
* **Summarize it:** Provide a shorter version highlighting the key steps and ingredients.
* **Convert units:** Change measurements (e.g., from ounces to grams).
* **Calculate nutritional information (approximately):** Based on the ingredients, I can give a rough estimate of calories, fat, protein, etc. (Note: this would be an estimate only).
* **Generate variations:** Suggest alternative ingredients or methods to create different versions of the recipe.
* **Answer questions:** If you have any specific questions about the recipe, I can try to answer them.
Let me know what you’d like me to do!
Instructions
- Crush the Oreos: Use a food processor or a rolling pin to crush the Oreos into fine crumbs.
- Combine with Butter: Mix the crushed Oreo crumbs and melted butter in a medium bowl until evenly moistened.
- Press into Pan: Press the mixture firmly into the bottom of a 9×13 inch baking pan.
- Pre-bake (Optional): Pre-bake at 350°F (175°C) for 8-10 minutes for a crispier crust. Let cool slightly.
- Melt the Butter: Melt the butter in a microwave-safe bowl.
- Combine Sugars and Cocoa: Add granulated sugar, brown sugar, cocoa powder, and salt to the melted butter. Whisk until smooth.
- Add Vanilla and Eggs: Stir in vanilla extract. Add eggs one at a time, mixing well after each addition.
- Incorporate Flour: Gradually add flour, mixing until just combined.
- Add Chocolate Chips: Fold in the chocolate chips.
- Pour over Crust: Pour the brownie batter evenly over the prepared Oreo crust.
- Beat Cream Cheese: Beat the softened cream cheese until smooth and creamy.
- Add Sugar: Gradually add the granulated sugar, beating until well combined.
- Incorporate Vanilla: Stir in the vanilla extract.
- Add Eggs: Add the eggs one at a time, mixing on low speed until just combined.
- Pour Cheesecake Filling: Carefully pour the cheesecake filling evenly over the brownie layer.
- Bake: Bake at 350°F (175°C) for 45-55 minutes, or until the cheesecake filling is set around the edges but still slightly jiggly in the center.
- Cooling Process: Turn off the oven and crack the oven door slightly. Let the cheesecake bars cool in the oven for about 1 hour.
- Refrigerate: Cool completely at room temperature. Then, cover and refrigerate for at least 4 hours, or preferably overnight.
- Cutting and Serving: Cut into squares using a sharp knife.
Notes
**Possible Enhancements:**
* **Yield:** Add the yield (e.g., “Makes 16-24 bars”) to the beginning of the recipe.
* **Prep Time & Cook Time:** Include estimated prep time and cook time for planning purposes. For example: “Prep Time: 30 minutes, Cook Time: 45-55 minutes, Cooling Time: Several Hours”
* **Nutritional Information (Optional):** If desired, you could add approximate nutritional information per serving (calories, fat, sugar, etc.). This would require calculation.
* **Ingredient Notes:**
* **Oreo Crust:** Specify if regular or double-stuffed Oreos are preferred.
* **Brownie Layer:** Clarify the type of cocoa powder (Dutch-processed or natural). This can affect the flavor and texture.
* **Instruction Clarifications:**
* **Brownie Layer – Step 1 (Melt the Butter):** Specify the power level and time increments for melting the butter in the microwave to prevent burning.
* **Assembling and Baking – Step 2 (Bake):** Mention checking for doneness with a toothpick inserted into the brownie layer (it should come out with moist crumbs).
* **Visual Cues:** If this is for a website or blog, consider where you would insert photos of the process (e.g., after each section like Oreo Crust, Brownie Layer, Cheesecake Filling, Assembling and Baking).
* **Alternative Baking Pan:** Mention if a different size pan can be used and how it would affect baking time.
* **Storage Instructions:** Be more specific about storage. “Store leftover cheesecake bars in an airtight container in the refrigerator for up to 5 days *or freeze for up to 2 months*.”
**Example of Incorporating Some Suggestions:**
**Recipe: Slutty Cheesecake Bars** (Makes 16-24 bars)
Prep Time: 30 minutes, Cook Time: 45-55 minutes, Cooling Time: Several Hours
**I. Ingredients:**
* **Oreo Crust:**
* 36 Oreo cookies, finely crushed (about 3 cups) (Regular or Double-Stuffed)
* 6 tablespoons (3 ounces) unsalted butter, melted
* **Cheesecake Filling:**
* 3 (8 ounce) packages cream cheese, softened to room temperature
* 1 1/4 cups granulated sugar
* 1 teaspoon vanilla extract
* 3 large eggs
* **Brownie Layer:**
* 1 cup (2 sticks) unsalted butter
* 1 cup granulated sugar
* 1 cup packed light brown sugar
* 1 cup unsweetened cocoa powder (Dutch-processed or Natural)
* 1/2 teaspoon salt
* 2 teaspoons vanilla extract
* 4 large eggs
* 1 cup all-purpose flour
* 1 cup chocolate chips (semi-sweet or dark, your preference!)
**II. Instructions:**
* **Preparing the Oreo Crust:**
1. **Crush the Oreos:** Use a food processor or a rolling pin to crush the Oreos into fine crumbs.
2. **Combine with Butter:** Mix the crushed Oreo crumbs and melted butter in a medium bowl until evenly moistened.
3. **Press into Pan:** Press the mixture firmly into the bottom of a 9×13 inch baking pan.
4. **Pre-bake (Optional):** Pre-bake at 350°F (175°C) for 8-10 minutes for a crispier crust. Let cool slightly.
* **Making the Brownie Layer:**
1. **Melt the Butter:** Melt the butter in a microwave-safe bowl in 30-second intervals at 50% power, stirring in between, until melted.
2. **Combine Sugars and Cocoa:** Add granulated sugar, brown sugar, cocoa powder, and salt to the melted butter. Whisk until smooth.
3. **Add Vanilla and Eggs:** Stir in vanilla extract. Add eggs one at a time, mixing well after each addition.
4. **Incorporate Flour:** Gradually add flour, mixing until just combined.
5. **Add Chocolate Chips:** Fold in the chocolate chips.
6. **Pour over Crust:** Pour the brownie batter evenly over the prepared Oreo crust.
* **Preparing the Cheesecake Filling:**
1. **Beat Cream Cheese:** Beat the softened cream cheese until smooth and creamy.
2. **Add Sugar:** Gradually add the granulated sugar, beating until well combined.
3. **Incorporate Vanilla:** Stir in the vanilla extract.
4. **Add Eggs:** Add the eggs one at a time, mixing on low speed until just combined.
* **Assembling and Baking:**
1. **Pour Cheesecake Filling:** Carefully pour the cheesecake filling evenly over the brownie layer.
2. **Bake:** Bake at 350°F (175°C) for 45-55 minutes, or until the cheesecake filling is set around the edges but still slightly jiggly in the center. A toothpick inserted into the brownie layer should come out with moist crumbs.
3. **Cooling Process:** Turn off the oven and crack the oven door slightly. Let the cheesecake bars cool in the oven for about 1 hour.
4. **Refrigerate:** Cool completely at room temperature. Then, cover and refrigerate for at least 4 hours, or preferably overnight.
5. **Cutting and Serving:** Cut into squares using a sharp knife.
**III. Tips for Success:**
* Use room temperature cream cheese and eggs.
* Don’t overmix the brownie and cheesecake batters.
* Cool the cheesecake bars gradually.
* Customize with different chocolate chips, caramel sauce, nuts, or sprinkles.
* Store leftover cheesecake bars in an airtight container in the refrigerator for up to 5 days or freeze for up to 2 months.
**IV. Troubleshooting:**
* **Cracked Cheesecake:** Cover with whipped cream, chocolate shavings, or fresh berries. Cool more gradually and avoid overbaking in the future.
* **Soggy Crust:** Pre-bake the crust.
* **Uneven Layers:** Use a kitchen scale to measure ingredients accurately and spread batters evenly.
**V. Why This Recipe Works:**
* Combines Oreos, brownies, and cheesecake.
* Oreo crust provides a crunchy base.
* Brownie layer adds a rich, chocolatey flavor.
* Cheesecake filling provides a creamy, tangy contrast.
**VI. Serving Suggestions:**
* Perfect for parties, potlucks, or any occasion.
* Serve chilled.
* Add a dollop of whipped cream or a scoop of ice cream.
These are just suggestions, and the level of detail you include will depend on your target audience and the purpose of the recipe. Overall, you’ve done a great job!